Printer driver settings
A key part of colour management is to ensure that you understand where the actual colour management is taking place.
The best policy when printing is to let the printing software apply the printer profile and the printer driver needs to be set NOT to apply any further colour management. The image file must only be corrected for the printer's characteristics with the profile a single time.
A common error for novice users is to "double profile". This is where a profile is applied in the editing software and then again in the printer driver itself. This double correction will produce poor results and must be avoided.
Please read the instructions for each manufacturer and follow them exactly. The illustrations for this are taken from the Windows drivers for each manufacturer, Mac drivers will look slightly different, but have the same overall functions. Please use the links below to see how to set some of the more common printer drivers not to apply a profile unnecessarily.
Epson
Canon
Hewlett Packard
Others
Epson
This is the driver set up on older printers such as the Stylus Photo 890, 1290, 2100, 2200.Main Tab:

Media Type: (as appropriate)
Color: check color option
Mode: Custom Then click: Advanced: In the advanced dialogue box:
Print Preview: unchecked. (see note below)
It's worth noting that the "Print Preview" option may be useful to preview layouts, but cannot be trusted to assess the final print's colour balance at all.
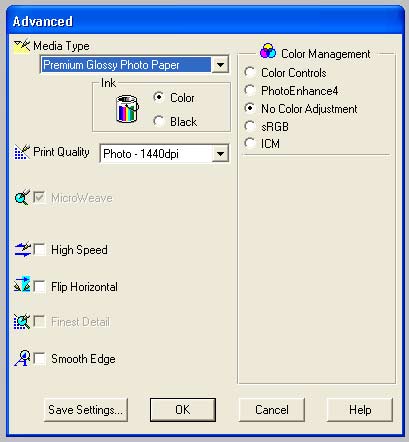
Check paper type is correct;
Color still selected;
Print Quality 1440 dpi(or appropriate);
Microweave unchecked;
Edge smoothing unchecked;
Flip horizontal unchecked;
High speed unchecked;
Finest detail unchecked;
Color Management; No Color Management checked
Paper config at defaults
Paper source; As appropriate
Paper Size; A4
Copies; 1
Orientation; Landscape (Rotate unchecked)
Printable area; Standard and centred
All unchecked
A final note on this. The Print preview function on the Epson drivers is NOT colour managed correctly, so don't expect the colours to be correct. It's really just layout guide.
Epson 2100/2200 printers.
If you have the grey balancer software installed please ensure that no correction is set in the grey balancer software options.
Latest Epsons
The latest Epson Stylus Photo printers like the R800 and R1800 have a newer printer driver design.
When you first use the driver you get the screen below, click on the advanced button to get to the important colour management settings.
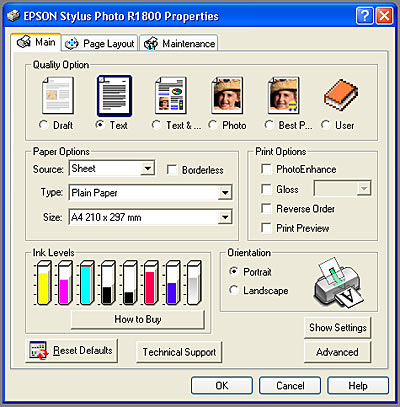
It's now worth checking the "Show this screen first" check box in the bottom right to save time in future.
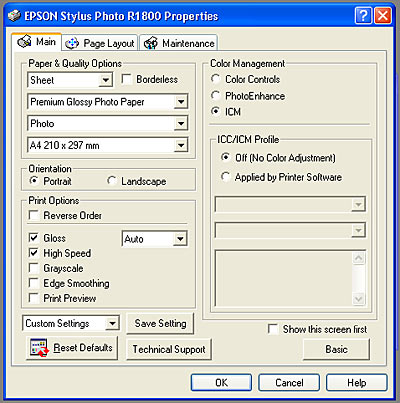
Main Tab:
In the "Color Management" box, select "ICM"
In the "ICC/ICM Profile" option select "Off (no color Adjustment). This allows your software to apply the required profile, if any.
If you are printing out our targets ensure "Edge Smoothing" is turned OFF.
A final note on this. The Print preview function on the Epson drivers is NOT colour managed correctly, so don't expect the colours to be correct. It's really just layout guide.
Canon
Select the printer you wish to print to in the "Page setup" dialogue box;Click on Properties;
In the printer properties dialogue box you will need to make the following settings on each tab.
Main Tab:
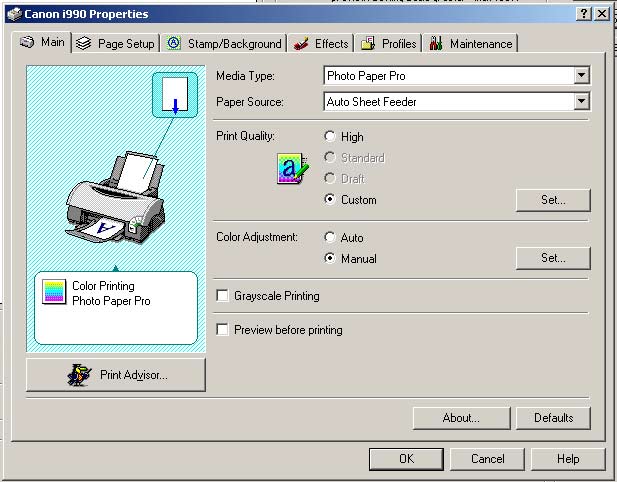
Select appropriate media type
Select appropriate media source
Print Quality: Select: Custom then "Set..."
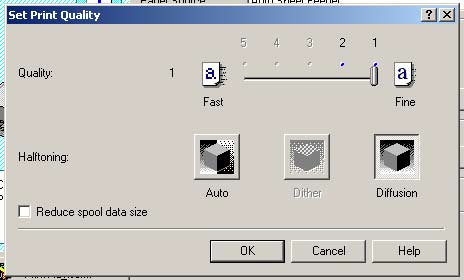
In Custom settings select:
Quality: Fine
Halftoning: Diffusion
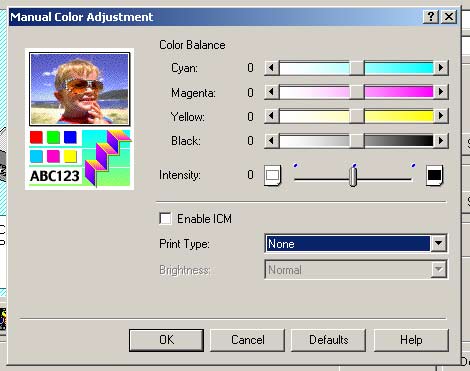
Set all the color Balance options to the centre 0 position
DO NOT check ICM box
Select Print Type: NONE
Preview before printing: unchecked
Page Set up Tab:
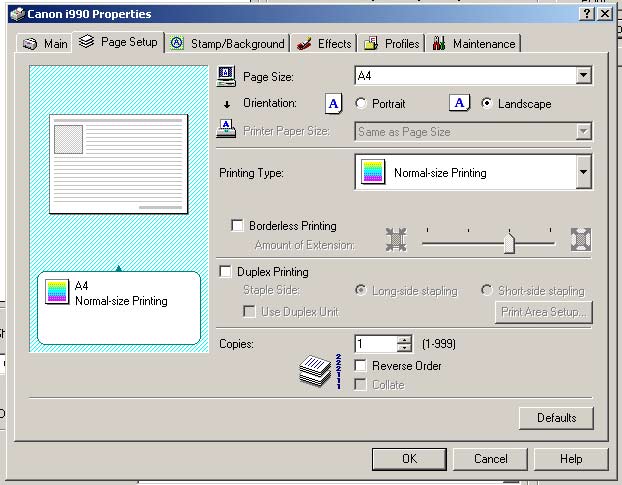
Page Size: A4
Orientation: Landscape
Printing Type: Normal-size printing
Borderless printing: unchecked
Duplex printing: unchecked
Copies: 1
Nothing selected
Nothing selected
Nothing selected
Note: This tab/page is not connected with ICC/ICM colour printing profiles, it just saves a set of driver settings. You may find it useful to save the above settings as a default for printing with colour management in future.
Hewlett Packard
For older printers HP recommend setting the Color Space option on the color tab in their printer driver to "ICM enabled" when printing targets for profiling and setting the profile in the driver. And NOT applying a profile in the printing software.
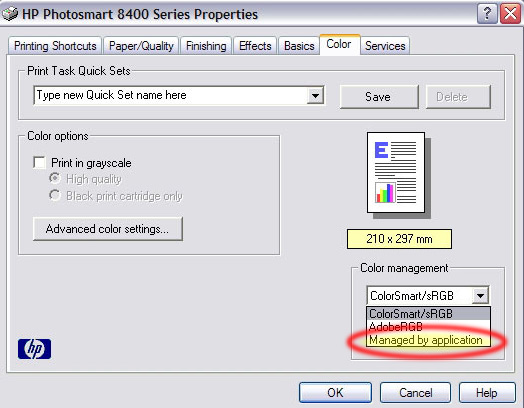
For more recent HP printers, we suggest using the 'managed by application option in the color management section on the color tab in the driver to switch off colour managemnt in the printer driver and apply a printer profile in your printing software.
Others
Please consult your printer documentation and set the printer driver NOT to apply any profile if possible.